
Buying guide
AeroPress guide: recipes, filters and travel use
How the AeroPress works, paper vs metal filters, starting recipes and travel kits.
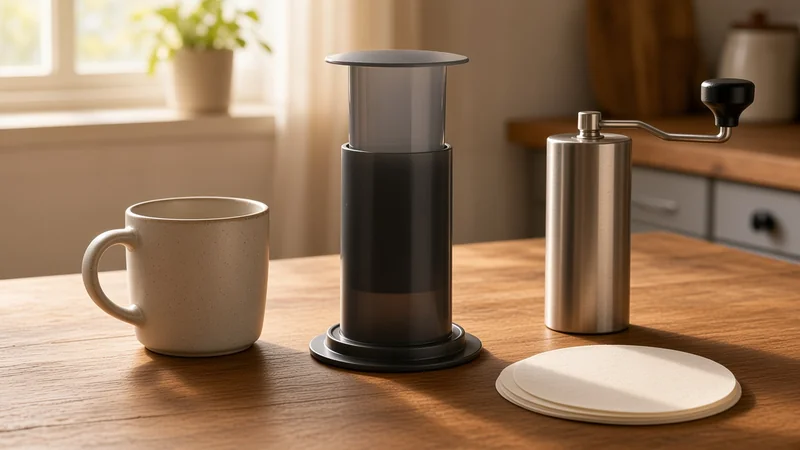
Use a locked filter cap on a stable mug, wet and stir the grounds, then press gently. Follow the recipe for your AeroPress model; filter material and dilution change the cup more than optional gadgets.
- Short immersion plus gentle pressure through a filter.
- Paper = cleaner cup; metal = more oils.
- A burr grinder matters more than accessories.
How it works
The AeroPress steeps coffee and water, then presses the slurry through a filter into a mug. Grind and contact depend on the chosen recipe; the maker describes wetting, immersion and pressure filtration rather than a universal time for every model.
Paper versus metal filters
Paper yields a cleaner cup. Rinse to drop paper taste and preheat the cap. Metal disks pass oils and more body — and more sediment if fine.
Keep spare papers dry in the tube. Metal needs thorough rinsing so oils do not go rancid.
Travel and hotel brewing
The tube packs papers and a scoop. Pair with a hand burr and pre-weighed beans. Heat with a hotel kettle or camp stove — Travel coffee kits: camp brewing and hand grinders.
Press only into sturdy mugs. Cool before sealing wet plastic into a bag.
Carry grinders onboard when flying; checked bags crush adjustment rings.
Fault matrix
| Symptom | Likely cause | Try |
|---|---|---|
| Sour, thin | Under-extracted | Finer, hotter, longer |
| Bitter, drying | Over-extracted | Coarser, shorter, cooler |
| Hard press | Too fine / high dose | Coarsen or reduce dose |
| Gritty | Metal + fine grind | Paper or coarsen |
Change one variable per brew. Log settings even across brands — Grind size by brew method.
Set up the upright brewer safely
The AeroPress how-to instructions should be the starting point for your exact chamber and filter cap. Check the seal and cap before adding hot water. Use a sturdy mug with an opening that supports the brewer securely, on a level surface that cannot skate when you press. Thin or damaged glass is a poor support for downward force.
Fit the correct filter and lock the cap fully. Wet the paper if your chosen instructions call for it and discard any rinse water before brewing. Put the coffee in the chamber and settle it so the water reaches the whole bed. Keep fingers away from the hot cap and avoid resting the brewer on an improvised tall stack of scales, servers and adapters.
Separate concentrate from a full-mug recipe
An AeroPress recipe can produce either a concentrated base for dilution or a longer drink directly. Those are different workflows. Do not take a concentrate’s dry-coffee dose, replace its water with an entire mug and assume the original method still applies. Start with the maker’s recipe for the model, then write down the actual water and any dilution.
For concentrate, taste after dilution rather than judging the undiluted base as if it were finished filter coffee. If you plan a milk drink, add milk to the cup after pressing. This preserves the brewing process and lets you distinguish a coffee problem from a milk-texture problem. For a larger serving, respect chamber headroom instead of filling to the rim and trying to insert the plunger through overflowing slurry.
Stir to wet, then press without a struggle
Pour carefully and stir so no dry clumps remain. The manufacturer describes wetting, immersion and pressure filtration as separate parts of the process. Keep your stirring pattern and rest consistent while learning. Vigorous stirring can change extraction and move fine particles toward the filter, so adding more agitation is not automatically an improvement.
Press with gentle, steady force. If the plunger resists strongly, stop rather than leaning your body weight onto the mug. Check for an overly fine grind, an overloaded chamber, a blocked filter or an incorrectly fitted part. A harder push does not turn the brewer into an espresso machine. Release pressure safely according to the instructions before attempting to remove the cap.
Make experiments interpretable
Choose paper or metal and keep that choice fixed while adjusting grind. Paper retains more oils and fines; metal changes texture and may leave visible sediment. A comparison that swaps the filter, bean, grind and dilution together says little about which change you preferred.
Keep notes on the coffee, grinder setting, stirring, resting and final dilution. If a full mug tastes weak but not unpleasant, first check whether you added more water after pressing than intended. If it is drying or muddy, compare a coarser setting with the same filter and rest. Stop when the cup is satisfying; reproducing a liked drink matters more than chasing a recipe championship.
Clean the seal and pack a usable kit
After the brewer cools enough to handle, remove the cap, eject the puck and rinse the parts as the maker directs. Check the edge of the seal and the filter threads for trapped particles. Let the parts dry before enclosing them for travel. A wet closed travel pouch can turn a convenient brewer into the source of off aromas.
Pack filters in a dry sleeve, protect the plunger from crushing and verify that your destination has a safe hot-water source. A hand grinder is optional if you arrange suitable ground coffee, and a gooseneck is not essential for the upright immersion method. The important travel constraint is a stable mug and clean water, not a full countertop of accessories.
FAQ
Is inverted brewing necessary?
No. Use the manufacturer’s upright method, which avoids flipping a chamber of hot slurry.
Does it replace pump espresso?
It makes a concentrated coffee that can be diluted or mixed with milk, but does not reproduce a pump machine’s extraction.
Next step
For AeroPress guide: recipes, filters and travel use, compare bands on tiers or run the matcher once.
Sources
Spec notes for AeroPress guide: recipes, filters and travel use are compiled from maker docs and public references — not a hands-on review. Confirm live specs before buying.