
Buying guide
Cold brew: methods and gear
Immersion vs slow drip, ratios and storage.
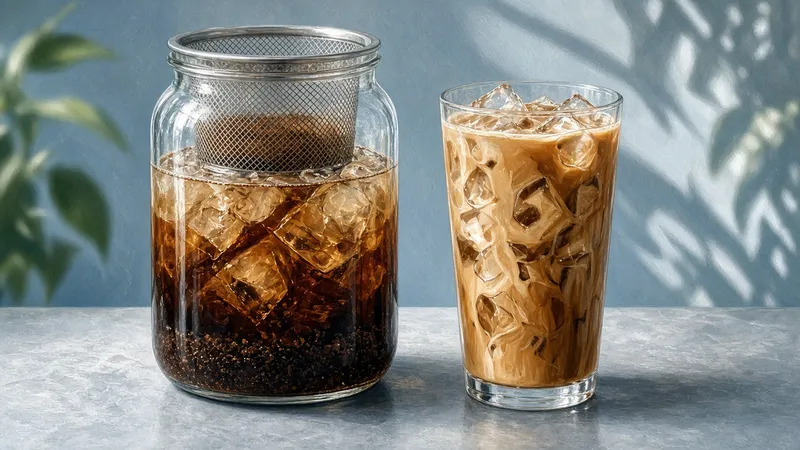
Make coarse-ground concentrate at the NCA’s 1:4 to 1:5 coffee-to-water ratio, steep about 12 hours, then filter and refrigerate. Dilute only what you will drink.
- Use coarse grounds and wet them completely.
- Keep the concentrate separate from milk and serving ice.
- A covered jar and a suitable filter can replace a dedicated brewer.
Choose the drink before choosing the vessel
Cold brew is extraction with cool water, not hot coffee poured over ice. It suits someone who wants a refrigerated batch ready to dilute, particularly when an iced drink is the everyday goal. A hot-brewed iced coffee remains a better choice if you want the aroma and bright flavors of a hot extraction. Neither method is inherently a superior version of the other.
Plan the finished serving before filling a large jar. Concentrate takes less refrigerator space than ready-to-drink coffee, but it is easy to forget dilution and pour something far stronger than intended. Label the jar as concentrate. Keep drinking water or serving ice available so other people can make a consistent cup without guessing.
Set a single recipe and record it
The National Coffee Association cold-brew guide gives a starting ratio of 1 gram of coffee to 4–5 grams of water, with approximately 12 hours of contact. Use that range here; do not mix it with an unrelated ready-to-drink recipe. Weigh the dry coffee and the water separately, and record which end of the range you chose.
The same guide permits refrigerator or room-temperature steeping. Choose a consistent location and keep the container covered. A colder steep and a warmer steep are different conditions, so do not compare them as if only the beans changed. Start with the published contact time, then evaluate the filtered and diluted cup before changing the next batch.
Check filter fit and usable capacity
A clean covered container, a French press or a filter pitcher can all work. Allow space for the grounds to swell and for stirring; the labeled liquid capacity is not a promise that the vessel holds that much water plus dry coffee. A narrow-neck bottle may be convenient for pouring but miserable for removing spent grounds.
A mesh basket is convenient to lift out, but it passes more fine sediment than paper. A cloth bag needs thorough washing and drying between uses. Paper can polish the cup after the initial coarse filtration. Choose the filter for the texture you want and the cleaning you will actually do. Check that replacement filters are available before buying a proprietary pitcher.
Wet, cover, steep and separate
Grind coarse, as the NCA recommends. Add the water gradually and stir gently until the dry clumps disappear. Grounds floating at the top are not necessarily a problem, but a dry pocket inside a floating raft has not received the same contact as submerged coffee. Avoid packing a filter bag so tightly that water cannot reach its center.
Cover the vessel and note when the steep began. At the end of the contact period, separate the coffee from the grounds rather than leaving the whole slurry in the refrigerator. Lift a basket slowly or decant through a suitable filter into a clean container. If a French press is the brewing vessel, plunge gently and transfer the coffee; the press is not a permanent storage jar with grounds left inside.
Let filtration happen under gravity. Squeezing a cloth bag aggressively can push fine particles into the drink. If paper drains slowly, remove the coarse solids first instead of forcing the entire slurry through a small paper cone. Keep a stable support under the filter so a heavy wet bed cannot tip into the finished batch.
Dilute the serving, not the entire batch
Concentrate is an ingredient. Pour some into a cup and add water gradually, tasting before introducing milk or sweetener. Ice also contributes dilution as it melts, so a drink that tastes right immediately may become weak later. For a carry-out cup, evaluate the flavor after the ice has begun melting rather than compensating with an unpredictable extra scoop of grounds next time.
Milk changes both the texture and the storage requirements. Add it to the serving instead of the storage container. People sharing the batch can then choose their own milk or avoid it, and the plain concentrate remains clearly identified. Do not infer caffeine content from a smooth taste; this guide does not measure it.
Refrigerated storage with a stated limit
OXO’s cold-brew instructions say to seal the concentrate and refrigerate for up to two weeks. That is the single storage window used here, for plain concentrate made and stored according to those instructions, not a guarantee for dairy drinks, unclean vessels or room-temperature storage.
Date the container when brewing finishes and keep it closed between pours. Clean the lid and pouring lip as well as the jar. Do not top up an old batch with a new one, because that hides the age of what remains. Discard questionable coffee; pleasant smell alone does not establish food safety. Follow any shorter limit supplied with your equipment or ingredients.
Diagnose the cup after filtration
For a gritty drink, first improve separation: let sediment settle, decant gently or use a paper finish. Changing steep time will not remove solids already passing through mesh. If the concentrate tastes balanced but the served drink is watery, reduce serving dilution before changing the brew recipe.
If the cup is harsh or woody, check whether grounds remained in contact after the planned steep ended. If it tastes like the refrigerator, inspect the seal and surrounding odors. Sour smells from a reusable bag call for cleaning or replacement, not stronger coffee. Keep brief notes on ratio, grind, location, steep and dilution so the next adjustment addresses an observed problem.
FAQ
Should I dilute the whole batch before refrigerating it?
Keep plain concentrate in its labeled, sealed storage container and dilute the serving. Adding milk or ice to each cup lets people choose their drink without changing the storage conditions of the remaining concentrate.
Why is my cold brew gritty even after a long steep?
Steeping longer does not remove particles. Separate coarse grounds first, then let sediment settle or finish through a suitable paper filter. Do not force a clogged filter or squeeze a cloth bag aggressively.
Does a smooth taste mean cold brew contains less caffeine?
No. Smoothness is not a caffeine measurement. Coffee choice, concentration and serving dilution all matter; this guide does not measure the caffeine in your batch.
Next step
For Cold brew: methods and gear, compare bands on tiers or run the matcher once.
Sources
Spec notes for Cold brew: methods and gear are compiled from maker docs and public references — not a hands-on review. Confirm live specs before buying.